What amperage for a marine battery charger?

Power requirements need to be best managed once you are on the high seas. Batteries play a key role in this, and all the right steps need to be taken to do this properly. One of the choices to be made is the battery, and the various details associated with it, such as amperage.

The importance of a good charger

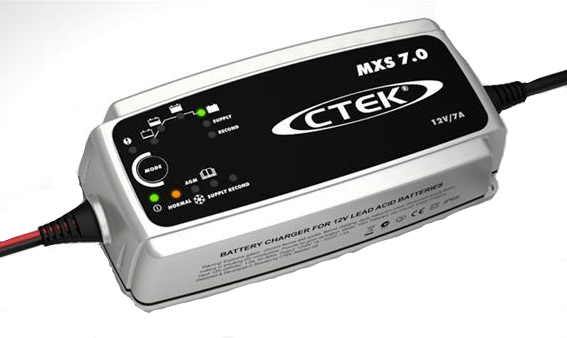
The performance of the energy devices available on the open sea must be optimal. The boat battery charger must be in this spirit, otherwise it may be a nuisance for your sea travel. When deciding on one, it is essential that it meets several high quality criteria.

Having a good amperage for the charger is one of the necessities that ensure good performance for your battery. This allows the battery to be used to its full potential. So don’t skimp on the details when choosing.

Choosing the right amperage for your battery

The batteries themselves are one of the points to prioritise when deciding on the amperage. The parameters of the battery should be used to determine the most suitable amperage. A general rule of thumb is that the level of the boat battery charger a general rule of thumb is that the amperage level of the battery should be 20-25% that of your battery.

For example, for an average 400mA battery, you should choose a charger model that varies between 80A and 100A. If you stray too far from these amperage ranges, it could be harmful to both the charger and the battery. Also, don’t hesitate to ask questions to the salesman before making any purchases.

Other criteria for the charger

Among the important details that affect the choice of a boat battery charger, we can mention the management of the heat emitted. It is normal for the battery to increase in temperature when it is in operation. However, this becomes more important the larger the battery is.

The charger itself can be affected by this heat if it is too close to your battery. So you need to choose a model that handles this problem as well as possible. Secondly, batteries can also be charged from several points, which will charge individually.

Choosing the right battery

Before you even decide on a boat battery charger, you need to make a good choice for the battery itself. If you take the right measurements for this element, it will not be too difficult to choose a good charger.

The power is one of the most important points to consider. In particular, it must be adapted to your boat, and to details such as the size of your boat. The larger your boat, the more powerful the battery will need to be for its energy requirements. Also, taking your time before deciding on a particular battery will ensure optimal use.

Which navigation lights for a motorboat?

Boat navigation lights are a category of safety equipment that a boat must have. Mechanically propelled models of less than 12 metres are not exempt from this slightly more accommodating rule.

Which navigation lights should I choose?

Generally speaking, the same rule applies to all motorboats. This is true if they are less than 50 metres in length when it comes to boat navigation lights. The fact is that these models are required to have :

  • A continuous white masthead light with a visibility angle of 225°;
  • The side lights comprising the starboard (green) and port (red) lights projecting light continuously for an angle of visibility of 112.5°;
  • A white uninterrupted stern light with a visibility angle of 135°.

Less than 12 metres may derogate from the rule

It goes without saying that in accordance with RIPAM Rules 22, 23 and 25, vessels under 50 metres are required to display the above-mentioned navigation lights. However, this legislation has also provided that models of less than 12 metres can derogate from this regulation.

They can dispense with the stern and masthead lights and replace them with another light.

This is a light visible over the entire horizon, which is added to the side lights and provides a white light that illuminates the whole boat continuously, thanks to a 360° angle of visibility.

Under 7 metres too

If those under 12 metres can benefit from a certain flexibility in the use of boat navigation lights, those under 7 metres in length are more flexible. Simply because for the latter, it is enough to install the light visible over the whole horizon and that’s it. This is, of course, provided that their speed does not exceed 7 knots.

You should also be aware that the range of this navigation light is limited to 2 miles. This is also the case for boats under 12 metres with a range of 1 mile for the side lights and 2 miles for the masthead and stern lights.

For motorboats between 12 and 50 metres in length, the masthead light has the advantage of reaching the 5-mile mark. The other mandatory navigation lights in this category are limited to 2 miles. The quality of the product can influence its performance, so you should zoom in on this.

Who blows the foghorn?

Travelling in maritime waters requires measures to be taken, such as the use of a foghorn. This makes it possible to make noise and signal our presence to other boats. Some boats are required to use this type of device.

Boats in fog

If the fog level exceeds a certain threshold, it becomes necessary to use the horn. Without this action, the surrounding boats may collide with yours. There is a set of criteria that you need to meet for this type of device. For example, you must be heard for at least 2 nautical miles, or 4km.

The main purpose here is to let people know that there are other boats in the area. Some vessels may need assistance, and by signalling your presence, you make yourself available. If the fog greatly impairs visibility, your foghorn should be used frequently until it clears.

Models that are required to have a

The size of your boat is the decisive point in whether or not you need a foghorn or not. If your boat is 12 metres or longer, you are obliged to buy one. If not, you are liable to a fine.

Below this threshold, there are no such penalties if you do not have a working horn. On the other hand, it is still advisable, because of its most important practical application at sea. In many cases it can be of great use to you.

The need to make noise when boating

On large bodies of water it is important to be able to determine which boats are present in your immediate vicinity. Even if it is not a foghorn for small boats, you should be able to indicate your presence acoustically.

For this you can use a pan, for example, on which you tap. The main thing is to be able to be heard over a long distance. This measure in particular can help you to notify others of your presence on the sea. This is because there are no elements that will block the passage of sound.

The nature of the noise to be made

Another rule about foghorns for boats is that they should produce a sound that can be either low or high pitched. Smaller boats should use a high-pitched sound, and as the boats get larger, a low-pitched sound should be used.

So, from a certain threshold, large boats will be required to use gongs. These produce a powerful sound with a low tone. Thus, the sound can be used to deduce that a boat is not far away, as well as the size of the boat. The trick is to be careful when making your choices about these.

What is marine varnish? What is a polyurethane varnish?

Generally speaking, marine varnish is used to embellish and preserve the wood of the boat. It is often used to protect the vessel from various aggressions produced by navigation and is indeed applied on traditional boats. The protection given to the vessel can extend the life of the boat.

Which marine varnish should I choose?

There are several types of marine varnish and it can be quite difficult to choose one. So what are the different categories?

  • In terms of composition, there are two types of marine varnish: one-component and two-component. The single-component varnish is suitable for use on marine veneered backings. The two-component varnish used to protect the plywood.
  • With regard to the finish of the varnish, a distinction is made between: gloss varnish and matt varnish. Gloss marine varnish guarantees a glossy coating for your ship. Matt marine varnish is a sober varnish.
  • When it comes to the colour of the varnish, there are colourless and tinted varnishes. By its name, clear varnish does not add any colour to the wood. In contrast to colourless varnish, tinted varnish gives your wood a new look.

How do you apply marine varnish?

Before the procedure, you must first prepare the woodwork to improve the adhesion of the paint on the surface. Repair the woodwork and remember to cut off any worn areas. Traces of the old varnish should be removed by sanding without solvent. To complete the sanding, use manual sanding sheets while working in the direction of the wood. To revive the colour of the wood and modernise the adhesion of the marine varnish, apply an undercoat. The varnish is applied with a brush and at least 3 to 5 uniform and homogeneous coats. The recommended drying time between each coat is 24 hours.

What is a polyurethane varnish?

Polyurethane varnish is a very tough type of varnish formulated so that its microscopic chains of resin molecules bind deeply as they dry. This results in a more water, solvent, abrasion and impact resistant finish than conventional varnishes. There are two types of polyurethane varnish: water-based and oil-based.

Water-based polyurethane varnish

Water-based polyurethane varnish can offer a range of choices of different qualities and durability. It is recommended to choose a varnish that contains urethane to obtain the best quality. This type of varnish does not produce any odour and is not harmful to health. On the other hand, water-based polyurethane varnish is less resistant to calcium resulting from the outdoors, such as snow on boots in winter. It is therefore advisable to protect floors with water-based polyurethane varnish.

Oil-based polyurethane varnishes

Oil-based polyurethane varnish, also known as Varathane, is an economical and easy-to-apply product for wood floors. However, it can give off a strong odour when applied. This varnish tends to have a yellowish tinge. It has low scratch resistance, which means that it needs to be restored more often. This type of varnish is not recommended as it can be harmful to the environment and health.

How does a bulb work?

A priming bulb is essential for the proper functioning of a boat’s engine. You should not take it lightly if you want to sail safely. For a sea angler, it is important to check that the bulb is working properly. Here are a few points to bear in mind in this respect.

The importance of a baiting bulb

A primer bulb is an important element for a vessel because of its usefulness for the engine. Its main role is to fill the carburettor of your boat. This means that you will not have any problems with the amount of fuel when you are on the water. Normally, this accessory is used to draw the fuel through the appropriate line.

The bulb can be primed manually if necessary. All you need to do is access the engine location to do so. You will only have to press the primer a few times to properly mix the air with the fuel. In any case, this accessory should work by itself if it is of good quality and in good condition.

Why doesn’t a primer bulb work?

Like all parts of the boat, a priming bulb like all parts of the boat, a carburettor may not work in some cases. This may be due to a problem with the bulb or the fuel lines. The fuel line can also have an impact on the proper functioning of your bulb. Also note that the fuel line can let in too much air if it is cracked or hardened.

You may have a problem with the boat’s carburettor drawing fuel. You will also need to ensure that the air filter is working properly to get the most out of your primer bulb. A plug in the tank can also cause you problems.

A bulb as a diagnostic tool for your boat

As you might expect, a bulb can be used as a diagnostic tool for your fishing vessel. The accessory acts directly on the fuel supply system. You can then use it in case the engine loses power and even stalls. Specifically, the primer bulb will force fuel to the engine.

You can check the air intake in the system if the fuel refuses to rise despite the bulb’s operation. You can then check the accessory to ensure that your engine is supplied with fuel and power. You can then fish with peace of mind even in the open sea.

Check whether the bulb is flattening or hardening

Have you noticed that the bulb remains flattened after starting the motor? Note that this kind of problem can also occur after handbaiting. In any case, this means that the accessory is clogged. It is also possible that your bulb is malfunctioning. The product may have problems with the valves.

It may also be that the attachment does not harden at a certain time. This may be caused by a downstream leak at the bulb. You can also check the carburettor float, which may be stuck.

How to install a bilge pump?

Unlike other means of maritime transport, a ship is like a large system in which every small or large part is interdependent. For large ships, the hold or the part fitted out to facilitate embarkation and disembarkation needs more careful maintenance. So the bilge pump keeps the bilge dry, both in emergency situations and during normal navigation. But how do you install a bilge pump?

How to choose a bilge pump

As a naval safety element for more comfort, the bilge pump is very necessary to keep your feet dry in case of water ingress. So, being a captain leading the whole crew or marine people, if you need to change your naval pump, there are different types. Several famous brands such as Johnson pump, Seaflo or Whale are ideal for large boats or even a small boat.

Nowadays, marine technology is constantly evolving. Experts are always looking for the best tools to minimise marine accidents such as sinking and leaking. Indeed, it is important to choose the right bilge pump to evacuate unnecessary water and waste.

What are the different types of bilge pumps?

There are 4 types of bilge pump that can be used depending on the size of your bilge:

  • portable hand pump or siphon pump: this hand pump is lightweight and has a low flow rate against water ingress. It requires no maintenance.
  • Diaphragm or fixed manual pump: this is a little stronger than the manual pump, its flow rate is between 25 and 100L/min.
  • remote turbine pump: this is a high-end turbine, with a power of 12 to 15 V and a flow rate of 1950 to 4500 L/H. It handles dirty water and small waste.
  • electric submersible pump: also very high flow rate, its flow rate reaches approximately 1500 to 4950 L/hour.

What process should be followed for optimal installation?

Like any other marine equipment installation, the installation of a bilge pump also requires a specialist. If you want to adopt an automatic bilge pump, you can combine it with a mechanical automatic switch. This provides an automatic function. Here is the ideal installation process for installing a bilge pump.

Firstly, you need to choose the position of the bilge pumps in relation to the arrangement of the other pumps and pipes and the direction of water flow. You need a strainer, a reinforced hose, nozzles and non-return valves to prevent water from flowing down the strainer. There are 5 steps to follow:

  1. prepare the site
  2. install the strainer and float: connect the end caps and small pipes to be combined
  3. connect the electric wires: glue and connect with a switch
  4. install the grommet
  5. install the discharge pipe or large outlet pipe with the strainer

After installing your boat bilge pump in an optimal way, you will not have any problems with unwanted water leakage.

Which power separator should I choose?

A battery separator coupler is a dual purpose device usually used on boats. It mainly connects the engine battery to the auxiliary battery of the engine. By means of an alternator, the battery coupler charges the auxiliary battery with an engine battery. In general, this device parallels the engine battery with the secondary batteries to recharge the latter. As a result, it is energy self-sufficient during long journeys. But for your vessel to function properly, it is necessary to take certain precautions.

How to choose the best splitter coupler?

It is necessary to check the power of your alternator before installing a battery coupler to find out if the alternator power is sufficient to charge two or more batteries. They should also be the same age. Some conditions are essential for choosing the battery coupler.

  • Firstly, you need to know the Euro standard of your boat. It should be as low as possible.
  • Secondly, find out about the current of your alternator and the voltage of different batteries connected to it.
  • It is also important to find out the composition of the boat’s secondary battery. For example, AGM boat battery or Lithium boat battery.

To assemble the system, it is best to assemble wiring with a suitable cross-section of about 6 mm to 10 mm2. It is also best to combine batteries with the same capacity or with a maximum of 10% margin between the other batteries.

How does a battery separator coupler work?

The battery separator coupler has an essentially simple mode of operation. While sailing, the engine battery is charged by the alternator. However, batteries tend to have a threshold that should not be crossed. When this threshold is reached, the battery coupler mechanically charges the auxiliary battery.

When the vessel stops, a significant voltage drop remains. The battery coupler automatically splits the two batteries when the voltage drop reaches the necessary threshold, in order to prevent the engine battery from discharging. The use of the splitter coupler is then flexible to certain regulations. Moreover, the choice of a battery coupler the choice of a separator coupler depends on various elements: the Euro standard, the current, the power and the composition of the auxiliary battery, as mentioned above.

What are the advantages of the battery coupler?

The battery coupler makes it easier to use the other equipment on board your vessel. This device mainly protects the engine battery. By pairing the right fuse between the auxiliary battery and the battery separator coupler, short circuits in the system are avoided. The battery coupler is indeed space-saving due to its size and partly low weight. The installation of a battery coupler can also extend the life of the batteries. Assembling the batteries with such a device necessarily guarantees a comfortable journey with optimal energy autonomy for long-distance travel.

What is an electric windlass and how do I disengage it?

The windlass is usually a device located in the anchor locker or on the foredeck of the boat. Its role is to lift and drop the anchor quickly without affecting the back. At present, all windlasses are already electrically operated and can be operated manually, with a remote control or controlled from a cockpit. But how important is the electric windlass and how can it be disengaged?

The importance of an electric windlass

Firstly, an electric windlass is intended for boats with an inboard engine such as large cruising yachts. It is also perfect for those who tend to sail single-handed. An electric windlass usually has three parts: the motor, the gearbox and the spool. These three parts are what make this windlass work properly.

The electric motor produces the shaft rotation with a power that is reduced by the reduction gearbox. The sprocket, the impression ring, drives the track with the force of the motor. This action allows the anchor to be raised and lowered smoothly. With a fairly fast speed, the electric windlass allows the chain to be hauled up to 12 m/min.

How to choose an electric windlass

While being equipped with an anchor, it is necessary to choose a good electric windlass adapted with the boat. Several parameters must be respected in order to make the right choice.

  • The models: an electric windlass has two models: the vertical and the horizontal. The vertical model is perfect if you have a large space below deck and a leech depth of less than 40 cm. This model has a 180° chain and sprocket surface. The second model is also ideal for a boat without space. Even so, this only means that installation and maintenance can be carried out easily.
  • Size: the electric windlass also depends on the size of the depth. For it is meant to accommodate the length of rope.
  • The motor: the windlass motor needs to be powerful so that it can easily pull any kind of weight

How to disengage an electric windlass

The electric windlass can be disengaged for manual operation with a winch or ad-hoc crank. Here are a few steps to guide you through the process of switching to manual operation. First of all, you need to have spare parts such as two small screws and a large part exactly like the crank.

  • Before loosening the headstock, you will first need to lock the post but this should not be done too hard using a screwdriver.
  • After the pin is really blocked, you can then loosen the headstock with the crank.
  • Then put the identical part to the crank and fix it with the two screws.
  • Finally, you have to fix the crank so that you can easily reassemble the chain with the crank.

What paint below the waterline?

Maintaining your boat requires a lot more time, especially for the renewal of the paint on all its parts. In the case of the waterline, that is, the line that separates the submerged part of the hull from the emerged part, it would be ideal to adopt a new marine paint. Painting the waterline has an effect on underwater life, and its beautiful colour reflects the good design of your vessel. That’s why it’s important to paint it to the required standard.

What does the waterline do?

The function of the waterline is to separate the living works or hull of a ship from the dead works or the land area. The waterline allows the boat to carry a large load capacity depending on the desired craft from the start and even to the finish.

Why paint the waterline?

After many years of experience, boat builders have found that the waterline needs to be painted properly, especially when the existing paint is completely stripped. In the past, for boats with wooden hulls, painters used copper foil to prevent organisms from entering the hull. After a few years, most boats with steel or metal hulls were painted bright red

Nowadays, after various investigations, experts use specialised paints, called “antifouling paint”. These different types of marine paints protect the waterline and allow it to be painted in different colours, of different brands, depending on the type of coatings.

Preparation and steps to be taken

Any marine painting activity obviously requires careful preparation. For waterline painting, it is primarily a preparation of the hull or part of the hull. For this, a masking material for the boat is important. Then you need to provide the painting materials such as paint brushes, spray guns or rollers.

If everything is ready, you can start painting with the first coat, a light primer. Then move on to the thinner layer of colour and let it dry for about 10 minutes for a second coat. Finally, a third coat seems to be perfect and the waterline will look very pleasing in 2 hours.

What is the ideal paint for the waterline?

Almost all professional boats have a famous hull or red paint. Apparently the waterline is coloured a darker red. For the first coat, Interprotect or Yacht Primer are marine paints designed for professional use. For the second, there is a specialised paint called coatings or Epoxy. You can choose from different products such as “Watertite”.

Finally, in order to have a beautiful paint, specialists have advised to apply a third coat. Thus, marine paints called “interprime 880” or “One up” are the most suitable undercoats.

How to apply hard matrix antifouling?

In order to protect the underwater part of your boat’s hull from the harmful effects of algae and shellfish, you have chosen a hard matrix antifouling. And now that you have it in your hands, all you have to do is apply it using the right method.

Why choose a hard matrix antifouling?

If you have chosen a hard matrix antifouling if you have chosen a paint, it is because you are aware that this is the paint that best corresponds to your selection criteria. These include the type of boat you have, the area in which you sail and the frequency of use.

With regard to the type of boat, this protective paint is best suited to motorised boats with a sailing speed of over 25 knots. In general, it is perfect for polyester, steel or wooden hulls, except for aluminium and other light metals.

In terms of the environment in which it is used, think of this category of antifouling as being perfect for tidal areas, currents and long crossings. The fact is that with its hard matrix, it is designed to withstand rubbing, beaching, sand or even trailer rides. The same reason that makes this paint the best choice for frequent use

Equip yourself properly

You have chosen to do without the services of a professional. In that case, you need to equip yourself properly in the following steps.

Starting with the preparation phase of the hull, during which you will need a high pressure cleaner. But not only that, since sanding and stripping are also part of the process and require a scraper or water-based abrasive disc and antifouling stripper respectively.

You should also think about the materials needed to apply thehard matrix antifouling by equipping yourself with masking tape and thinner (optional). And since we’re talking about paint jobs, don’t forget the mixer, the paint tray, the rabbit’s foot and the support that goes with it.

In any case, don’t forget to protect yourself by wearing a mask, overalls, glasses and gloves.

Work like a specialist

Now that you have the necessary materials for the application of thehard matrix antifouling, all that remains is for you to work like a specialist, starting with the cleaning.

During this stage, your first objective is to remove the dirt from the hull using a high-pressure cleaner.

After that, make your hull look smooth to the touch by using the squeegee or water abrasive disc. This is the phase of scraping the surface, particularly targeting large imperfections.

If necessary, do not hesitate to use antifouling stripper for a final touch to remove all impurities. This is the optional stripping step.

Now that the hull is clean, remember to protect the unpainted surfaces by using masking tape. And above all, don’t forget to mix the antifouling well in order to make it homogeneous. This should be easy with the help of an electric drill or mixer.

Then you are ready to apply the hard matrix antifouling using the above-mentioned painting tools. A crucial phase that is carried out in two major steps:

  • Application of the first coat followed by a drying time of 3 to 4 hours at 20°C;
  • The application of the second coat followed by a drying time of at least 3 hours.

Please note: The application should be carried out in criss-cross patterns with emphasis on high friction areas. It is also advisable to allow 24 hours before applying the product to the water. at least 4 hours in case of stress.