How to install a bilge pump?

Unlike other means of maritime transport, a ship is like a large system in which every small or large part is interdependent. For large ships, the hold or the part fitted out to facilitate embarkation and disembarkation needs more careful maintenance. So the bilge pump keeps the bilge dry, both in emergency situations and during normal navigation. But how do you install a bilge pump?

How to choose a bilge pump

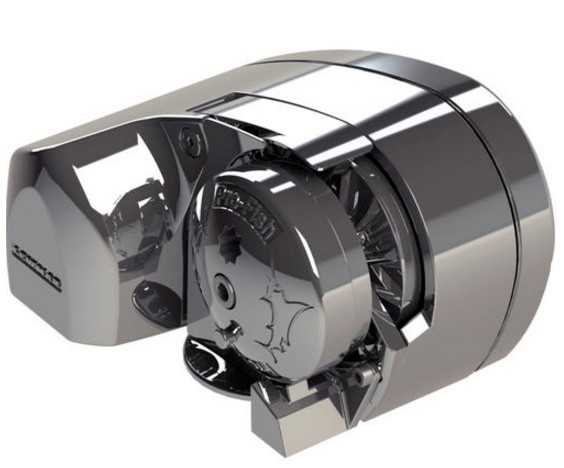
As a naval safety element for more comfort, the bilge pump is very necessary to keep your feet dry in case of water ingress. So, being a captain leading the whole crew or marine people, if you need to change your naval pump, there are different types. Several famous brands such as Johnson pump, Seaflo or Whale are ideal for large boats or even a small boat.

Nowadays, marine technology is constantly evolving. Experts are always looking for the best tools to minimise marine accidents such as sinking and leaking. Indeed, it is important to choose the right bilge pump to evacuate unnecessary water and waste.

What are the different types of bilge pumps?

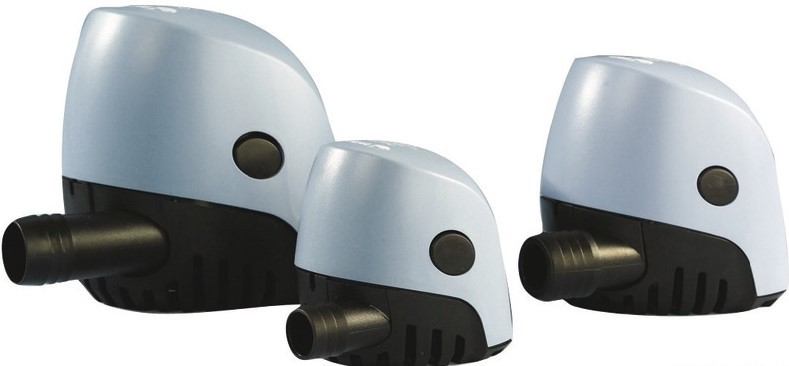
There are 4 types of bilge pump that can be used depending on the size of your bilge:

  • portable hand pump or siphon pump: this hand pump is lightweight and has a low flow rate against water ingress. It requires no maintenance.
  • Diaphragm or fixed manual pump: this is a little stronger than the manual pump, its flow rate is between 25 and 100L/min.
  • remote turbine pump: this is a high-end turbine, with a power of 12 to 15 V and a flow rate of 1950 to 4500 L/H. It handles dirty water and small waste.
  • electric submersible pump: also very high flow rate, its flow rate reaches approximately 1500 to 4950 L/hour.

What process should be followed for optimal installation?

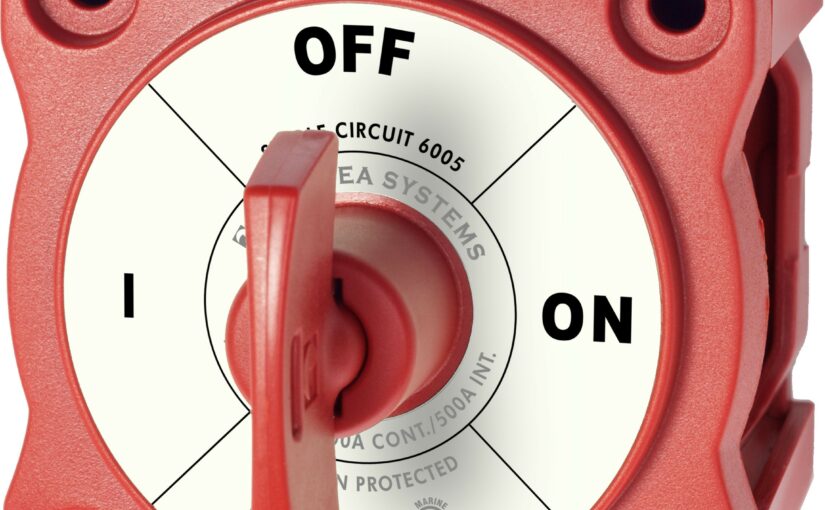
Like any other marine equipment installation, the installation of a bilge pump also requires a specialist. If you want to adopt an automatic bilge pump, you can combine it with a mechanical automatic switch. This provides an automatic function. Here is the ideal installation process for installing a bilge pump.

Firstly, you need to choose the position of the bilge pumps in relation to the arrangement of the other pumps and pipes and the direction of water flow. You need a strainer, a reinforced hose, nozzles and non-return valves to prevent water from flowing down the strainer. There are 5 steps to follow:

  1. prepare the site
  2. install the strainer and float: connect the end caps and small pipes to be combined
  3. connect the electric wires: glue and connect with a switch
  4. install the grommet
  5. install the discharge pipe or large outlet pipe with the strainer

After installing your boat bilge pump in an optimal way, you will not have any problems with unwanted water leakage.

Which power separator should I choose?

A battery separator coupler is a dual purpose device usually used on boats. It mainly connects the engine battery to the auxiliary battery of the engine. By means of an alternator, the battery coupler charges the auxiliary battery with an engine battery. In general, this device parallels the engine battery with the secondary batteries to recharge the latter. As a result, it is energy self-sufficient during long journeys. But for your vessel to function properly, it is necessary to take certain precautions.

How to choose the best splitter coupler?

It is necessary to check the power of your alternator before installing a battery coupler to find out if the alternator power is sufficient to charge two or more batteries. They should also be the same age. Some conditions are essential for choosing the battery coupler.

  • Firstly, you need to know the Euro standard of your boat. It should be as low as possible.
  • Secondly, find out about the current of your alternator and the voltage of different batteries connected to it.
  • It is also important to find out the composition of the boat’s secondary battery. For example, AGM boat battery or Lithium boat battery.

To assemble the system, it is best to assemble wiring with a suitable cross-section of about 6 mm to 10 mm2. It is also best to combine batteries with the same capacity or with a maximum of 10% margin between the other batteries.

How does a battery separator coupler work?

The battery separator coupler has an essentially simple mode of operation. While sailing, the engine battery is charged by the alternator. However, batteries tend to have a threshold that should not be crossed. When this threshold is reached, the battery coupler mechanically charges the auxiliary battery.

When the vessel stops, a significant voltage drop remains. The battery coupler automatically splits the two batteries when the voltage drop reaches the necessary threshold, in order to prevent the engine battery from discharging. The use of the splitter coupler is then flexible to certain regulations. Moreover, the choice of a battery coupler the choice of a separator coupler depends on various elements: the Euro standard, the current, the power and the composition of the auxiliary battery, as mentioned above.

What are the advantages of the battery coupler?

The battery coupler makes it easier to use the other equipment on board your vessel. This device mainly protects the engine battery. By pairing the right fuse between the auxiliary battery and the battery separator coupler, short circuits in the system are avoided. The battery coupler is indeed space-saving due to its size and partly low weight. The installation of a battery coupler can also extend the life of the batteries. Assembling the batteries with such a device necessarily guarantees a comfortable journey with optimal energy autonomy for long-distance travel.

What is an electric windlass and how do I disengage it?

The windlass is usually a device located in the anchor locker or on the foredeck of the boat. Its role is to lift and drop the anchor quickly without affecting the back. At present, all windlasses are already electrically operated and can be operated manually, with a remote control or controlled from a cockpit. But how important is the electric windlass and how can it be disengaged?

The importance of an electric windlass

Firstly, an electric windlass is intended for boats with an inboard engine such as large cruising yachts. It is also perfect for those who tend to sail single-handed. An electric windlass usually has three parts: the motor, the gearbox and the spool. These three parts are what make this windlass work properly.

The electric motor produces the shaft rotation with a power that is reduced by the reduction gearbox. The sprocket, the impression ring, drives the track with the force of the motor. This action allows the anchor to be raised and lowered smoothly. With a fairly fast speed, the electric windlass allows the chain to be hauled up to 12 m/min.

How to choose an electric windlass

While being equipped with an anchor, it is necessary to choose a good electric windlass adapted with the boat. Several parameters must be respected in order to make the right choice.

  • The models: an electric windlass has two models: the vertical and the horizontal. The vertical model is perfect if you have a large space below deck and a leech depth of less than 40 cm. This model has a 180° chain and sprocket surface. The second model is also ideal for a boat without space. Even so, this only means that installation and maintenance can be carried out easily.
  • Size: the electric windlass also depends on the size of the depth. For it is meant to accommodate the length of rope.
  • The motor: the windlass motor needs to be powerful so that it can easily pull any kind of weight

How to disengage an electric windlass

The electric windlass can be disengaged for manual operation with a winch or ad-hoc crank. Here are a few steps to guide you through the process of switching to manual operation. First of all, you need to have spare parts such as two small screws and a large part exactly like the crank.

  • Before loosening the headstock, you will first need to lock the post but this should not be done too hard using a screwdriver.
  • After the pin is really blocked, you can then loosen the headstock with the crank.
  • Then put the identical part to the crank and fix it with the two screws.
  • Finally, you have to fix the crank so that you can easily reassemble the chain with the crank.

What paint below the waterline?

Maintaining your boat requires a lot more time, especially for the renewal of the paint on all its parts. In the case of the waterline, that is, the line that separates the submerged part of the hull from the emerged part, it would be ideal to adopt a new marine paint. Painting the waterline has an effect on underwater life, and its beautiful colour reflects the good design of your vessel. That’s why it’s important to paint it to the required standard.

What does the waterline do?

The function of the waterline is to separate the living works or hull of a ship from the dead works or the land area. The waterline allows the boat to carry a large load capacity depending on the desired craft from the start and even to the finish.

Why paint the waterline?

After many years of experience, boat builders have found that the waterline needs to be painted properly, especially when the existing paint is completely stripped. In the past, for boats with wooden hulls, painters used copper foil to prevent organisms from entering the hull. After a few years, most boats with steel or metal hulls were painted bright red

Nowadays, after various investigations, experts use specialised paints, called “antifouling paint”. These different types of marine paints protect the waterline and allow it to be painted in different colours, of different brands, depending on the type of coatings.

Preparation and steps to be taken

Any marine painting activity obviously requires careful preparation. For waterline painting, it is primarily a preparation of the hull or part of the hull. For this, a masking material for the boat is important. Then you need to provide the painting materials such as paint brushes, spray guns or rollers.

If everything is ready, you can start painting with the first coat, a light primer. Then move on to the thinner layer of colour and let it dry for about 10 minutes for a second coat. Finally, a third coat seems to be perfect and the waterline will look very pleasing in 2 hours.

What is the ideal paint for the waterline?

Almost all professional boats have a famous hull or red paint. Apparently the waterline is coloured a darker red. For the first coat, Interprotect or Yacht Primer are marine paints designed for professional use. For the second, there is a specialised paint called coatings or Epoxy. You can choose from different products such as “Watertite”.

Finally, in order to have a beautiful paint, specialists have advised to apply a third coat. Thus, marine paints called “interprime 880” or “One up” are the most suitable undercoats.

How to apply hard matrix antifouling?

In order to protect the underwater part of your boat’s hull from the harmful effects of algae and shellfish, you have chosen a hard matrix antifouling. And now that you have it in your hands, all you have to do is apply it using the right method.

Why choose a hard matrix antifouling?

If you have chosen a hard matrix antifouling if you have chosen a paint, it is because you are aware that this is the paint that best corresponds to your selection criteria. These include the type of boat you have, the area in which you sail and the frequency of use.

With regard to the type of boat, this protective paint is best suited to motorised boats with a sailing speed of over 25 knots. In general, it is perfect for polyester, steel or wooden hulls, except for aluminium and other light metals.

In terms of the environment in which it is used, think of this category of antifouling as being perfect for tidal areas, currents and long crossings. The fact is that with its hard matrix, it is designed to withstand rubbing, beaching, sand or even trailer rides. The same reason that makes this paint the best choice for frequent use

Equip yourself properly

You have chosen to do without the services of a professional. In that case, you need to equip yourself properly in the following steps.

Starting with the preparation phase of the hull, during which you will need a high pressure cleaner. But not only that, since sanding and stripping are also part of the process and require a scraper or water-based abrasive disc and antifouling stripper respectively.

You should also think about the materials needed to apply thehard matrix antifouling by equipping yourself with masking tape and thinner (optional). And since we’re talking about paint jobs, don’t forget the mixer, the paint tray, the rabbit’s foot and the support that goes with it.

In any case, don’t forget to protect yourself by wearing a mask, overalls, glasses and gloves.

Work like a specialist

Now that you have the necessary materials for the application of thehard matrix antifouling, all that remains is for you to work like a specialist, starting with the cleaning.

During this stage, your first objective is to remove the dirt from the hull using a high-pressure cleaner.

After that, make your hull look smooth to the touch by using the squeegee or water abrasive disc. This is the phase of scraping the surface, particularly targeting large imperfections.

If necessary, do not hesitate to use antifouling stripper for a final touch to remove all impurities. This is the optional stripping step.

Now that the hull is clean, remember to protect the unpainted surfaces by using masking tape. And above all, don’t forget to mix the antifouling well in order to make it homogeneous. This should be easy with the help of an electric drill or mixer.

Then you are ready to apply the hard matrix antifouling using the above-mentioned painting tools. A crucial phase that is carried out in two major steps:

  • Application of the first coat followed by a drying time of 3 to 4 hours at 20°C;
  • The application of the second coat followed by a drying time of at least 3 hours.

Please note: The application should be carried out in criss-cross patterns with emphasis on high friction areas. It is also advisable to allow 24 hours before applying the product to the water. at least 4 hours in case of stress.